If you own a short-term rental, you've discovered that managing the financial side is more complicated than anyone mentioned when you bought the place. There's revenue from multiple booking platforms, each with different fee structures. There are expenses that need to be categorized correctly for your taxes. In many places, there is an occupancy tax to collect and remit. There are guests to track, payments to follow up on, and at tax time, someone needs to organize all of it. And then you need to establish a budget and measure how well your business is doing. Whether this is how you make money or it's a hobby business to support your property investment, managing the finances can be a lot.
Most owners handle the financial management with spreadsheets, a workbook per year, tabs for bookings and expenses, formulas to calculate totals. Some do it with pencil and paper. It works, but it has limits. The formulas can break. Historical comparisons require opening multiple files. And when your accountant asks "how much did you spend on repairs versus improvements?" you're back to sorting line by line.
This app is built specifically for rental property finances. By a rental owner who wanted a better way but didn't want an expensive subscription to a service that can do some things but not all the things. The main differences from using spreadsheets:
- Data entered once gets used everywhere. A booking record feeds your revenue totals, your occupancy calculations, your guest database, and your tax reports. You don't re-enter the same information in different places.
- Categories are already mapped to tax deduction categories. When you log an expense, you pick a category. That category already knows which line it belongs to. At year end, the organizing is done.
- Multi-year data lives in one place. You can see trends across years, whether revenue is growing, which expense categories are creeping up, how this season compares to previous ones.
- Calculations are consistent. Occupancy tax, payment schedules, platform fee adjustments, the app handles the math the same way every time.
- Support for up to 3 properties. If you manage more than one rental, each property gets its own bookings, expenses, pricing, and settings. Several screens offer a combined "All Properties" view so you can see your full portfolio at a glance.
Important: This app helps organize your rental finances for tax preparation, but it does not provide tax advice. Tax rules vary by jurisdiction and entity type. You are responsible for verifying all calculations and consulting with a qualified tax professional to ensure accuracy for your specific situation.
Rentalist.pro is organized around how rental finances actually flow:
- Dashboard: Your financial snapshot. Revenue, expenses, upcoming bookings, and payments due.
- Booking Management: Every reservation, with all its financial details: rent, fees, taxes, deposits, payments received.
- Expenses: Everything you spend to keep the property running, organized by tax deduction category.
- Payouts: What a booking platform actually paid you, lined up against what the booking expected. Only useful if you rent through Airbnb or Vrbo. See Payouts.
- Budget & Analytics: Budget planning, budget vs. actual tracking, occupancy tax payments, tax summary, and Analytics.
- Pricing: Your weekly rates calendar, next-year planning, platform-adjusted rates, and entry instructions. Organized in tabs: Pricing, Plan Next Year, Platform Pricing, and Entry Guide.
- Contacts & Marketing: Your guest directory, inquiry tracking, and mailing list tools.
- Documents: Receipts, invoices, contracts, permits and policies, kept as ordinary files in a folder you choose, plus the list of what's coming up for renewal. See Documents.
- Import/Export: Bring in historical bookings, expenses, and past inquiries from spreadsheets. The import wizard detects your columns, assesses spreadsheet quality, handles multi-sheet workbooks, and lets you create new properties during import.
- Settings: Property details, fee structures, tax rates, platform configurations, and multi-property management.
The first time you open Rentalist you're asked where you'd like to start: Name my property, Import a spreadsheet, Type it in, Restore from a backup, or Explore with sample data. It blocks nothing. You can close it and look around, and it isn't a wizard you have to finish.
The first four are live from the start, including on a brand-new install with no property yet. Naming the property is simply the first step of whichever route you pick: choose Import or Type it in and Rentalist takes you to the Property tab first, and holds your choice there. As soon as the property has a name, which happens as you type because the screen saves itself, a Continue button appears so you can carry on where you left off. If you stop halfway, the box comes back next time you open the app, showing the property step done and pointing you at the one that isn't.
Explore with sample data opens a made-up rental with two years of stays, expenses, a budget, a priced calendar, a cash flow forecast and a few receipts already filled in, so you can see what each screen does before you enter your own records. Click and type anywhere you like; none of it is kept. A band across the top of every screen says so, and End sample view clears the sample and brings you back to the welcome box, as quitting Rentalist does. While the sample is showing, backups, email checks, imports, restores and downloads are off, and your own records aren't opened. The sample choice is there until your property has a name.
"Set up" means two things only: a property with a name, and one answer about occupancy tax, which is which date decides the period a stay's tax counts in. Start on Settings → Fees & Taxes with Is this property required to pay occupancy tax? Answer No, my jurisdiction doesn't require it, and that is the whole answer. Answer Yes, add a payee, and pick its Tax Calculation Basis in that payee's own form: should a stay's tax count in the period of its arrival date, its departure date, be spread evenly across the stay, or belong to the period each payment arrives in? Until you pick, each stay's tax is counted by its departure date, so the box is a reminder, not a gate.
The box stops appearing for good once you've recorded a booking or an expense in any year, or once you've answered the occupancy tax question. Rentalist will work as soon as you have named your property, but to get the most out of it, run through the settings screens and fill in what you can, especially Fees & Taxes, Platforms and Expenses.
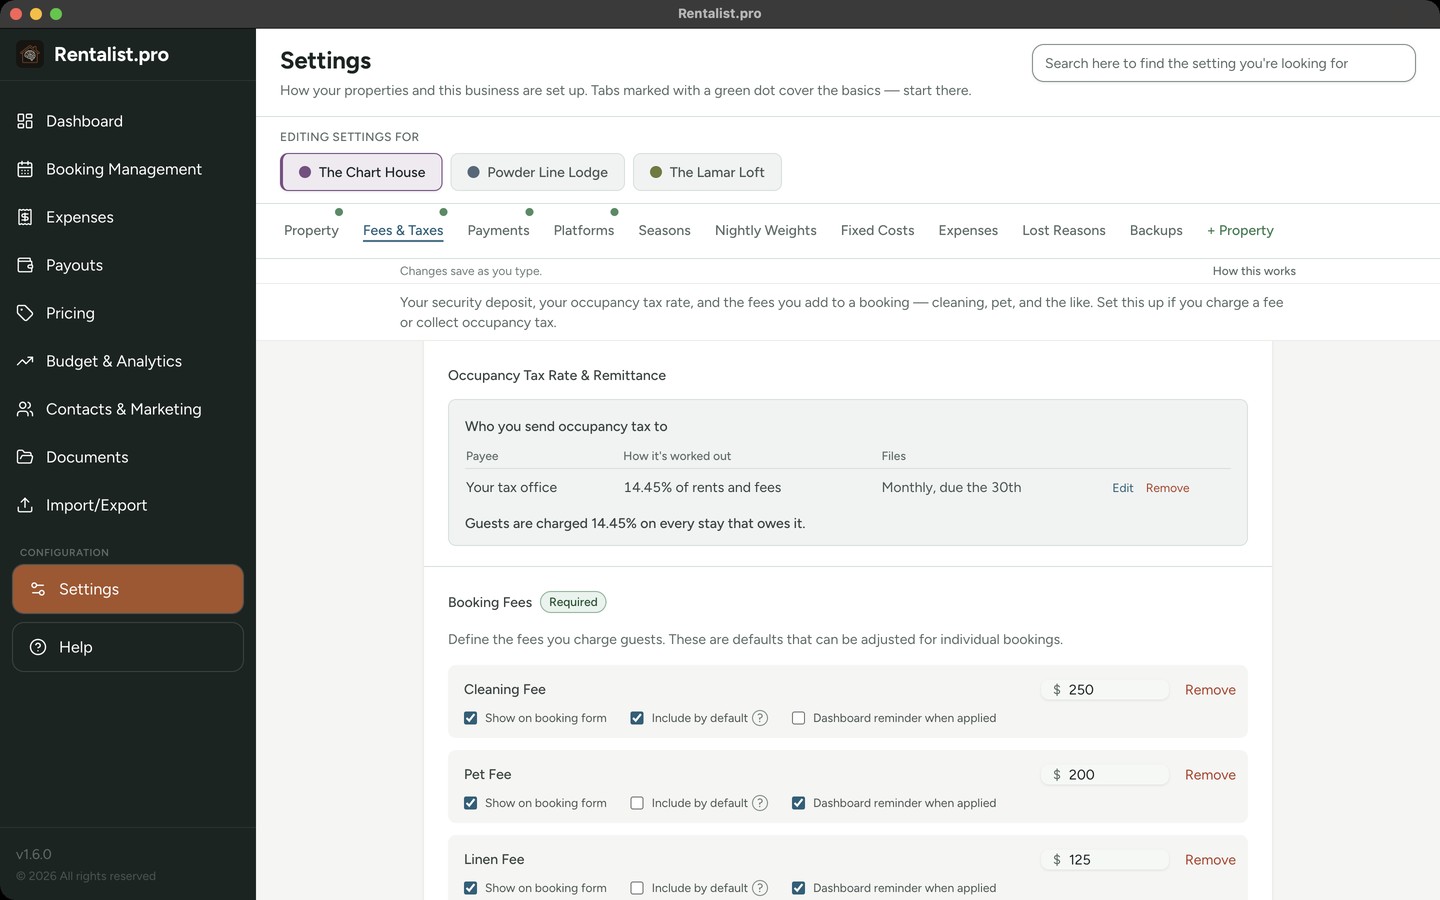
Start wherever your records are; you can enter or import bookings and expenses right away. These settings are what make the numbers match your rental, so they are worth doing early. Click Settings in the left sidebar and configure:
- Property: Name, address, week start day
- Fees & Taxes: Cleaning fee, pet fee, and your occupancy tax rate and remittance schedule
- Payments: How you collect payments (number of payments, timing)
- Platforms: Which booking platforms you use (Airbnb, Vrbo, Booking.com, etc.) and their commission rates
- Seasons: Your rental seasons with date ranges (peak, shoulder, off-peak, closed periods)
Getting these right first means your bookings will auto-calculate fees and taxes correctly. If you manage multiple properties, you can add them using the "+ Property" tab in Settings. Clone settings from your first property to save time.
Backups aren't on the list because there is nothing to set up: Rentalist starts backing your data up on its own the day you install it. If you would rather those copies went somewhere of your choosing, pick a folder on the Backups tab whenever you like.
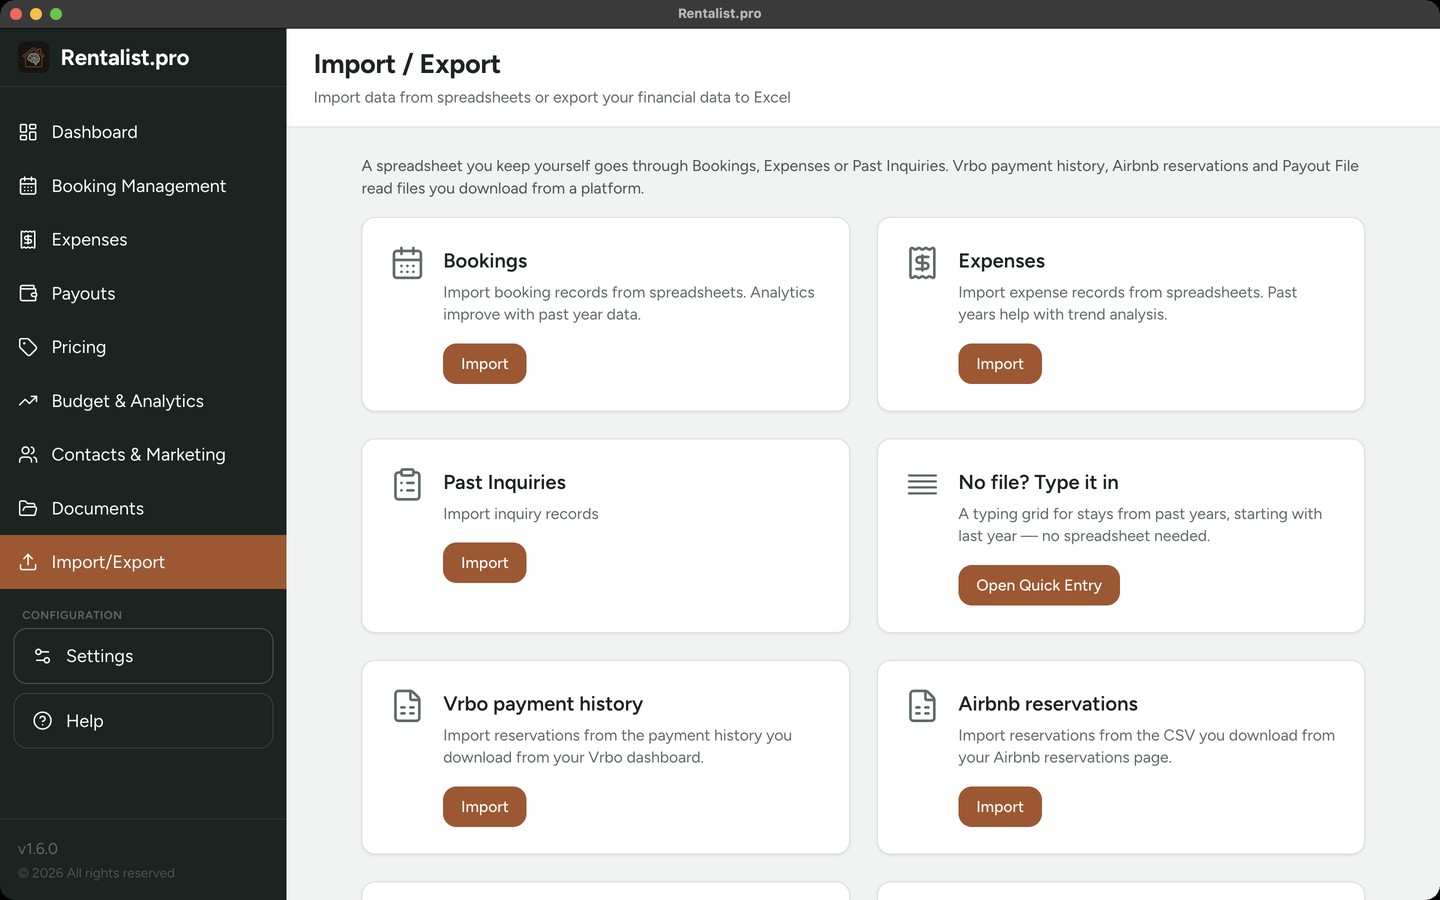
If you have bookings or expenses in spreadsheets from this year or previous years, importing them is the fastest way to get started. Click Import/Export in the left sidebar. The import wizard works with your existing spreadsheet format, you don't need to restructure anything. It detects your columns and figures out dates. For expense categories, it files a name that matches one of your categories and suggests a category for any other name, asking you to confirm before anything is imported. See the Importing Your Data section of this guide for a detailed walkthrough.
Why import first? Even a couple of years of past data transforms the Analytics section from blank charts into real insight, revenue trends, repeat guests, booking pace comparison, and year-over-year expense tracking. Past guest data also feeds your mailing list tools for marketing to people who've stayed with you before.
After importing, review the results. Some records may be flagged for review, the app will tell you which ones need attention. You can always edit imported records to fix any details.
Your inquiry history is probably already in your inbox. Almost nobody keeps a spreadsheet of the people who asked and didn't book, but those emails are still sitting in your mail. Connect that account and Rentalist can read years of platform inquiry emails and line them up to accept in bulk. It's the fastest way to make conversion rates and booking-lead analytics real on day one. See Inquiries from Email.
Not everyone has their rental data in spreadsheets, maybe you've been using paper records, a notebook, or just bank statements and memory. That's completely fine. You can enter everything by hand directly into the app. Here's roughly how long it takes:
- Current-year bookings: About 1-2 minutes per booking (dates, guest info, rate, fees, payments). If you have 15 bookings, budget about half an hour.
- Current-year expenses: About 1 minute per expense. Enter the bills that come back on a schedule first, the mortgage, insurance, and tick Repeats so the app fills in the rest. Then add one-time expenses individually.
- Past-year bookings: Faster since you only need the basics (dates, name, rate). Quick Entry on Booking Management gives you a typing grid for past years (the welcome box's Type it in also opens it on the current year, before you have any records), one row per booking, tab across, Enter for the next row. About 2 minutes each. Even approximate data is valuable for analytics.
- Past-year expenses: If you have totals by category from prior tax returns, you can enter one annual expense per category instead of individual line items. This takes about 10 minutes per year and still gives you year-over-year comparison data. Expenses has its own Quick Entry grid, available on any year.
Start with the current year's data, then add past years when you have time. The app works fine with just this year's data, historical data enriches analytics and guest marketing but isn't required.
After importing, check your current year's data. If there are bookings or expenses that weren't in your spreadsheets, add them by hand in Booking Management and Expenses.
Current-year accuracy matters for taxes. Make sure this year's bookings have correct fee amounts, tax calculations, and payment records. For past years where taxes are already filed, approximate data is fine, the main value is analytics and guest history.
Click Budget & Analytics in the left sidebar, then Budget Setup. Setting up a budget, even partway through the year, lets you track whether revenue and expenses are on target.
- Revenue forecast: Estimate how many weeks you expect to rent and at what rate
- Expense budgets: Set expected spending for each category. If you imported last year's data, you can initialize the budget from last year's actuals and adjust from there. Budget changes save automatically.
Guest contacts are automatically created when you save bookings. Click Contacts & Marketing in the left sidebar, then Guest Directory to see your contacts. They should already be populated from imported and manually entered bookings.
Click Documents in the left sidebar. Rentalist files receipts, invoices, signed agreements, permits and insurance policies as ordinary files in a folder on your computer, by default Documents → Rentalist Documents, and you can point it somewhere else. Everything else in the app works without this, so it's easy to skip. Do it now and your first receipt has somewhere to go.
Worth knowing before you rely on it: a backup carries your bookings, expenses and settings. It does not carry the documents folder. See Documents for how to protect and move it.
If you're starting the app partway through your rental year, the same steps apply. Be thorough with current-year data (you'll need it for taxes) and don't stress about getting historical data perfect (those taxes are already filed). Even approximate past data makes Analytics useful.
Once you're set up, enter bookings and expenses as they happen. It takes a minute or two per entry, much easier than reconstructing everything at year-end. The Dashboard keeps you updated on payments due, and Budget vs. Actuals shows whether spending is on track.